


WooCommerce gives flexibility, but running it can sometimes feel like patching plugins together just to keep the lights on. For stores ready to grow without constant technical headaches, learning how to migrate from WooCommerce to Shopify is a smart move.
This guide shows you the full journey, step by step, so you can switch platforms smoothly while protecting your data, your customers, and your growth.
WooCommerce to Shopify Migration: Your Risk-Free 5-Week Success Blueprint
Migrating from WooCommerce to Shopify doesn't have to risk your business success. With our proven systematic approach, you can complete the transition while preserving all customers, sales, and search rankings.
Let's dive into your complete migration roadmap:
Phase 1: Pre-Migration Planning (Week 1-2)
Thorough preparation forms the foundation of every successful migration and prevents costly mistakes.
Step 1: Audit Your Current WooCommerce Store

Before migrating effectively, you must know exactly what you're working with. This comprehensive audit serves as your migration roadmap and helps prevent costly data loss during the transition process.
- Inventory all products, categories, and variants
- Document current customer data and order history
- List all active plugins and their functions
- Identify custom code modifications
- Review current payment gateways and shipping methods
Pro tip: Use WooCommerce's native export feature or plugins like "Product CSV Import Suite" to extract product data systematically. Create a detailed spreadsheet documenting every product, including names, SKUs, pricing structures, variants, and inventory levels. This complete inventory becomes your master reference throughout the migration.
Step 2: Team Preparation and Communication Strategy
Migration success depends heavily on proper team coordination and customer communication. Establish clear roles and communication protocols before beginning the technical work.
- Assign specific team members to each migration phase
- Create internal communication channels for real-time updates
- Draft customer notification templates for each migration stage
- Establish escalation procedures for urgent issues
- Schedule regular team check-ins throughout the process
Designate a migration project manager to oversee the entire process and serve as the single point of contact for all stakeholders. Prepare your customer service team with FAQs about the migration, expected downtime, and new platform features.
Step 3: Set Up Your Shopify Account
Setting up your Shopify foundation correctly from the start saves countless hours later. Choose your plan based on transaction volume and feature requirements, not just monthly cost.
- Choose the right Shopify plan for your business
- Configure basic store settings
- Set up your domain and SSL certificate
- Install essential apps before migration
Consider these factors when selecting your plan: monthly transaction volume affects fees, advanced reporting needs, required staff accounts, and international selling capabilities.
Shopify Basic works for small stores, while Shopify Advanced suits larger businesses with detailed analytics requirements. Configure your store identity, currency settings, time zones, and legal pages during initial setup.
Step 4: Design and Theme Preparation
Your store's design affects everything from user experience to conversion rates. Prepare your visual foundation before importing any data to ensure brand consistency from launch day.
- Select a Shopify theme that matches your brand
- Customize theme settings and layout
- Prepare product images and brand assets
- Plan URL structure to maintain SEO value
Browse Shopify's theme store and identify 3-5 potential themes based on mobile responsiveness (over 50% of e-commerce traffic is mobile), built-in features, and loading speeds.
Premium themes often include advanced features that eliminate the need for additional app requirements. Map your current WooCommerce URLs to proposed Shopify URLs and create a comprehensive redirect strategy document.
Phase 2: Data Migration (Week 2-3)
This critical phase involves transferring all your business data safely from WooCommerce to Shopify.
Step 5: Export Data from WooCommerce
Clean, organized data export prevents countless headaches during the import process. Take time to do this thoroughly and systematically to avoid missing critical business information.
- Export products using WooCommerce native tools
- Extract customer information safely
- Download order history and transaction data
- Backup all media files and documents
Navigate to WooCommerce > Products > All Products and use the "Export" button to download comprehensive CSV files. Include all product fields: names, descriptions, prices, categories, and variants.
For customer data, export essential information only while excluding sensitive payment data to maintain privacy compliance. Remember to inform customers about data migration and obtain necessary consents.

Step 6: Data Structure Mapping and Cleanup
Before importing data into Shopify, optimize and organize your information for the new platform's structure. This preparation prevents import errors and ensures data integrity.
- Map WooCommerce product fields to Shopify equivalents
- Clean up duplicate or outdated product information
- Standardize product categories and tags
- Remove inactive customer accounts and spam registrations
- Consolidate similar product variants and options
Create a field mapping document that shows exactly how each WooCommerce data field corresponds to Shopify's structure. This becomes invaluable for troubleshooting import issues and ensures nothing gets lost in translation.
Step 7: Import Data to Shopify
The import process requires patience and systematic verification. Rushing this step often leads to data corruption or incomplete transfers that can impact sales immediately after launch.
- Use Shopify's migration tools effectively
- Import products with all attributes and variants
- Transfer customer data (following privacy regulations)
- Import order history for customer reference
Choose your migration method based on store complexity: Shopify Store Importer for basic migrations, third-party apps like Cart2Cart for complex stores, or CSV imports for maximum control.
Import products in small batches to monitor for errors and verify that all variants transfer correctly. Common issues include missing product variants, incorrect pricing, and broken image links.
Step 8: Data Verification and Cleanup
Quality control at this stage prevents customer complaints and lost sales later. Dedicate adequate time to thorough verification rather than rushing to launch.
- Verify product information accuracy
- Check pricing, inventory levels, and SKUs
- Validate customer accounts and contact information
- Test product categories and collections
Spot-check products across different categories and verify descriptions, specifications, and image display. Compare pricing between WooCommerce and Shopify stores to ensure sale prices and regular prices are transferred correctly.
Create a verification checklist and systematically review 10-15% of products thoroughly as a quality control measure.
Phase 3: Technical Configuration (Week 3-4)
Configure essential technical settings that make your store functional and optimized for conversions.
Step 9: Configure Payment and Shipping
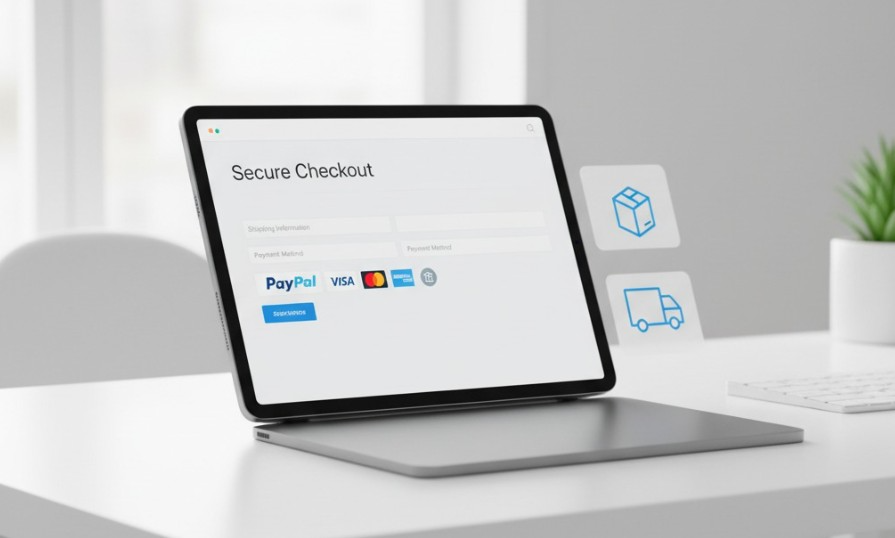
Smooth checkout processes are essential for sales conversions. Any friction in payment or shipping calculation directly impacts your bottom line and customer satisfaction.
- Set up payment gateways (Shopify Payments, PayPal, etc.)
- Configure shipping zones and rates
- Set up tax calculations by region
- Test the checkout process thoroughly
Enable Shopify Payments as your primary gateway for the lowest fees, configure PayPal Express for customer convenience, and add regional payment preferences.
Create shipping zones based on delivery areas and configure free shipping thresholds to encourage larger orders. Test all payment methods with small transactions to ensure proper processing.
Step 10: Advanced Analytics and Tracking Setup
Implement comprehensive tracking systems to monitor migration success and gather insights for future optimization. Proper analytics setup from day one ensures you don't lose valuable performance data.
- Install Google Analytics 4 with enhanced e-commerce tracking
- Set up Facebook Pixel and other marketing platform pixels
- Configure heat mapping tools for user behavior analysis
- Implement conversion tracking for all marketing channels
- Create custom events for migration-specific metrics
Establish baseline metrics from your WooCommerce store, including conversion rates, average order value, and customer acquisition costs. This data helps you measure the migration's impact on business performance.
Step 11: SEO and URL Management
Maintaining your search engine rankings during migration is crucial for preserving organic traffic and revenue that took years to build.
- Implement 301 redirects for all important pages
- Optimize meta titles and descriptions
- Set up Google Analytics and Search Console
- Configure SEO-friendly URL structures
Create redirects for all product pages, categories, blog posts, and account pages using Shopify's redirect manager or apps like TinyIMG for bulk management. Craft unique meta titles and compelling descriptions for all product pages.
Install Google Analytics 4 with enhanced e-commerce tracking and configure conversion goals to measure success.
Step 12: App Installation and Integration
The right apps replace WooCommerce functionality and often add capabilities you didn't have before. Strategic selection prevents feature gaps that could frustrate customers.
- Install necessary apps for lost WooCommerce functionality
- Set up email marketing integrations
- Configure inventory management systems
- Integrate with accounting software
Install essential apps: Judge.me or Loox for reviews, Swym for wishlist functionality, and Searchanise for advanced search capabilities.
Connect your existing email platform (Klaviyo, Mailchimp) and set up automated welcome sequences. Research thoroughly and read app reviews before committing to paid plans to avoid unnecessary costs.
Phase 4: Testing and Launch (Week 4-5)
Comprehensive testing ensures flawless functionality before going live with your new Shopify store.
Step 13: Comprehensive Testing

Testing everything before launch prevents costly mistakes and customer complaints. Every product page represents potential revenue, so thorough testing is essential.
- Test all product pages and functionality
- Verify checkout and payment processing
- Check mobile responsiveness
- Test customer account creation and login
Browse through products in all categories and test search, filtering, and variant selections. Complete full test purchases with real payment methods and verify that discount codes work correctly. Test your store on various mobile devices since mobile optimization is crucial for over half of e-commerce traffic.
Step 14: Load Testing and Performance Optimization
Before going live, ensure your new Shopify store can handle your typical traffic loads and peak shopping periods without performance issues.
- Conduct load testing with simulated traffic spikes
- Optimize images and media files for faster loading
- Test website performance during high-traffic scenarios
- Verify that all third-party integrations remain stable under load
- Create performance monitoring alerts for ongoing oversight
Use tools like GTmetrix or PageSpeed Insights to establish performance baselines and identify optimization opportunities. Set up monitoring systems to alert you immediately if site performance drops below acceptable levels.
Step 15: Go Live
The final step requires careful coordination to ensure a smooth transition with minimal business disruption. Proper timing and monitoring prevent revenue loss during the switch.
- Update DNS settings to point to Shopify
- Monitor site performance post-launch
- Check for any broken links or errors
- Announce the migration to customers
Update your domain's DNS records during low-traffic hours and set appropriate TTL values for faster propagation. Keep your WooCommerce site running 48-72 hours as a backup while monitoring website performance, transaction processing, and customer inquiries.
Send email announcements highlighting improvements and new features available on Shopify, and provide clear instructions for account access.
Step 16: Post-Launch Monitoring and Optimization
The first 72 hours after going live are critical for identifying and resolving any issues that weren't caught during testing. Active monitoring prevents small problems from becoming major customer complaints.
- Monitor real-time website analytics and user behavior
- Track customer service inquiries for migration-related issues
- Verify that all automated systems are functioning correctly
- Check the search engine crawling and indexing status
- Gather customer feedback through surveys and direct communication
Create a post-launch action plan that includes daily check-ins for the first week, weekly reviews for the first month, and ongoing monthly assessments. This systematic approach ensures your migration success continues long after the initial launch.
Monitor customer feedback, track key metrics, and be prepared to quickly address any issues that arise during the first few days. The investment in this systematic approach ensures zero data loss, minimal disruption, and preserved SEO rankings while positioning your business for enhanced growth on Shopify's robust platform.
Building A Scalable Future Beyond WooCommerce With Shopify
A successful move from WooCommerce to Shopify is about more than data transfer; it’s about creating a reliable foundation for growth. By auditing your store, mapping data carefully, configuring technical settings, and testing thoroughly, you set yourself up for a smooth transition that protects customers, sales, and SEO.
To make the process stress-free and future-proof, rely on expert WooCommerce to Shopify migration services from Velt2, ensuring your business scales confidently without technical roadblocks.
%20(1).jpg)

.jpg)
.jpg)